

Step by Step Guide: 360 Image Creation Using foldio360 Control & Edit software
Apr 24, 2023
360° images and videos don’t need to be overly complicated or pricey to create. Come along with us step-by-step as we create a 360° image while using our newest software applications, foldio360 Control & Edit, designed to control, edit, and export your 360° product images taken using the Foldio360 Smart Turntable or Foldio360 Smart Dome. Please note that these are just the steps we took for this series and are in no way the only method to take for 360° image creation.
✅ Things You Need:
- A 360° studio. Don’t know which one to use? Here, we break down the main differences between the 360° studios to make it easier for you to decide. In this tutorial, we will be using the Foldio360 Smart Turntable with the Foldio2 Plus Lightbox.
- Option1: Foldio360 Smart Turntable along with the Foldio2 Plus Lightbox or Foldio3 Lightbox
- Option2: Foldio360 Smart Dome
- foldio360 Control and foldio360 Edit downloaded on your Mac. These applications are exclusively supported on Mac Systems.
- DSLR camera
Step 1. Foldio Lightbox Set Up

- Assemble lightbox, attach backdrop, and plug your Foldio2 Plus Lightbox into a power source for lighting. Click here to get a more in depth step by step guide for product photography with our Foldio lightbox.
- Plug your Foldio360 device into a power source and place it inside your lightbox. If you see the status indicator light blinking, you’re good to go.
- Place your product you want to shoot at the very centerpoint of your turntable.
- Attach your camera to a tripod and make sure it’s facing toward the turntable’s status indicator light.
Now, you are all set up to shoot!
Step 2. Control Turntable and DSLR Camera with foldio360 Control (User Manual)
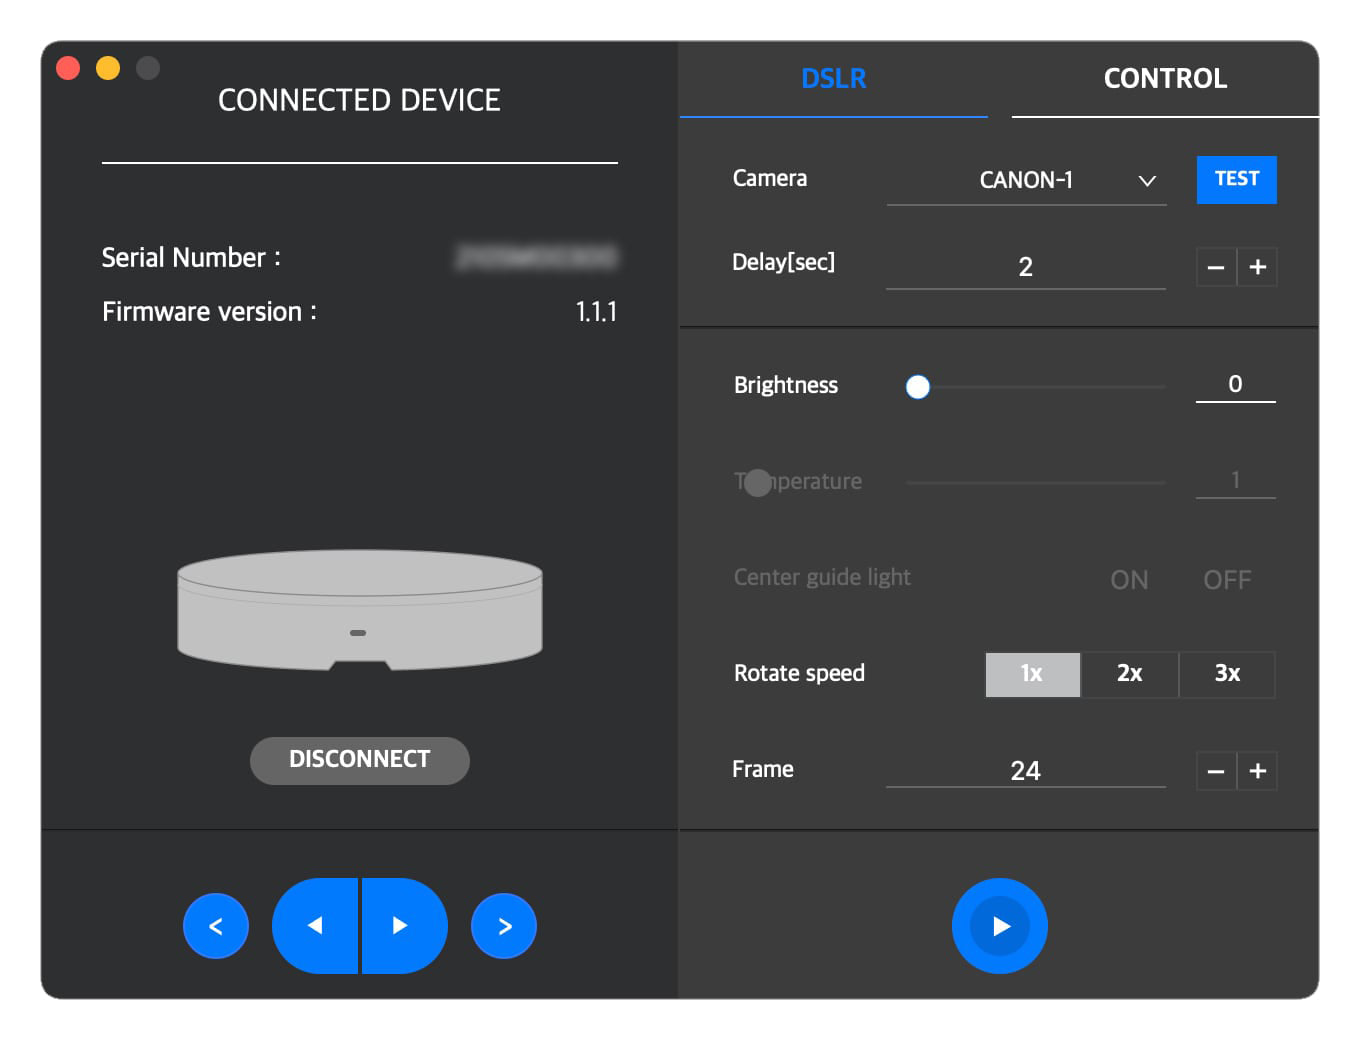
- Launch foldio360 Control on your Mac.
- Use bluetooth connection to connect your Mac to your Foldio360 device and select the device you wish to connect to. Note that the turntable requires Bluetooth 4.0 (BLE) or higher.
- Turn on your camera and check its compatibility here. The turntables use an IR (infrared) sensor to control DSLR cameras.
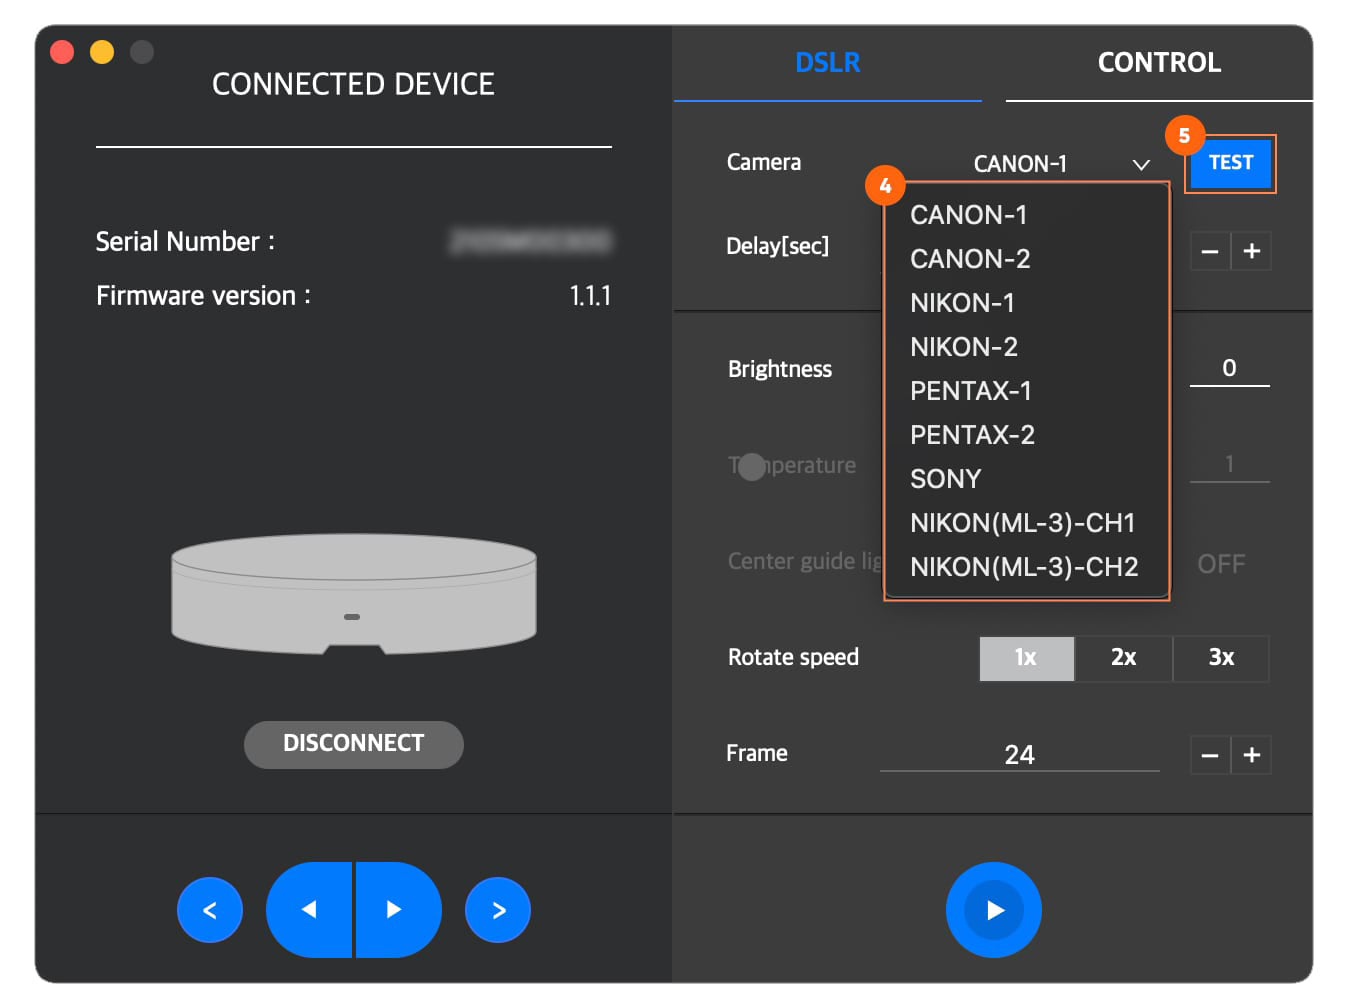
- On the right half of the screen under the DSLR tab, select which camera you wish to connect.
- Click the blue “test” button and check if a test shooting signal is sent to your camera.
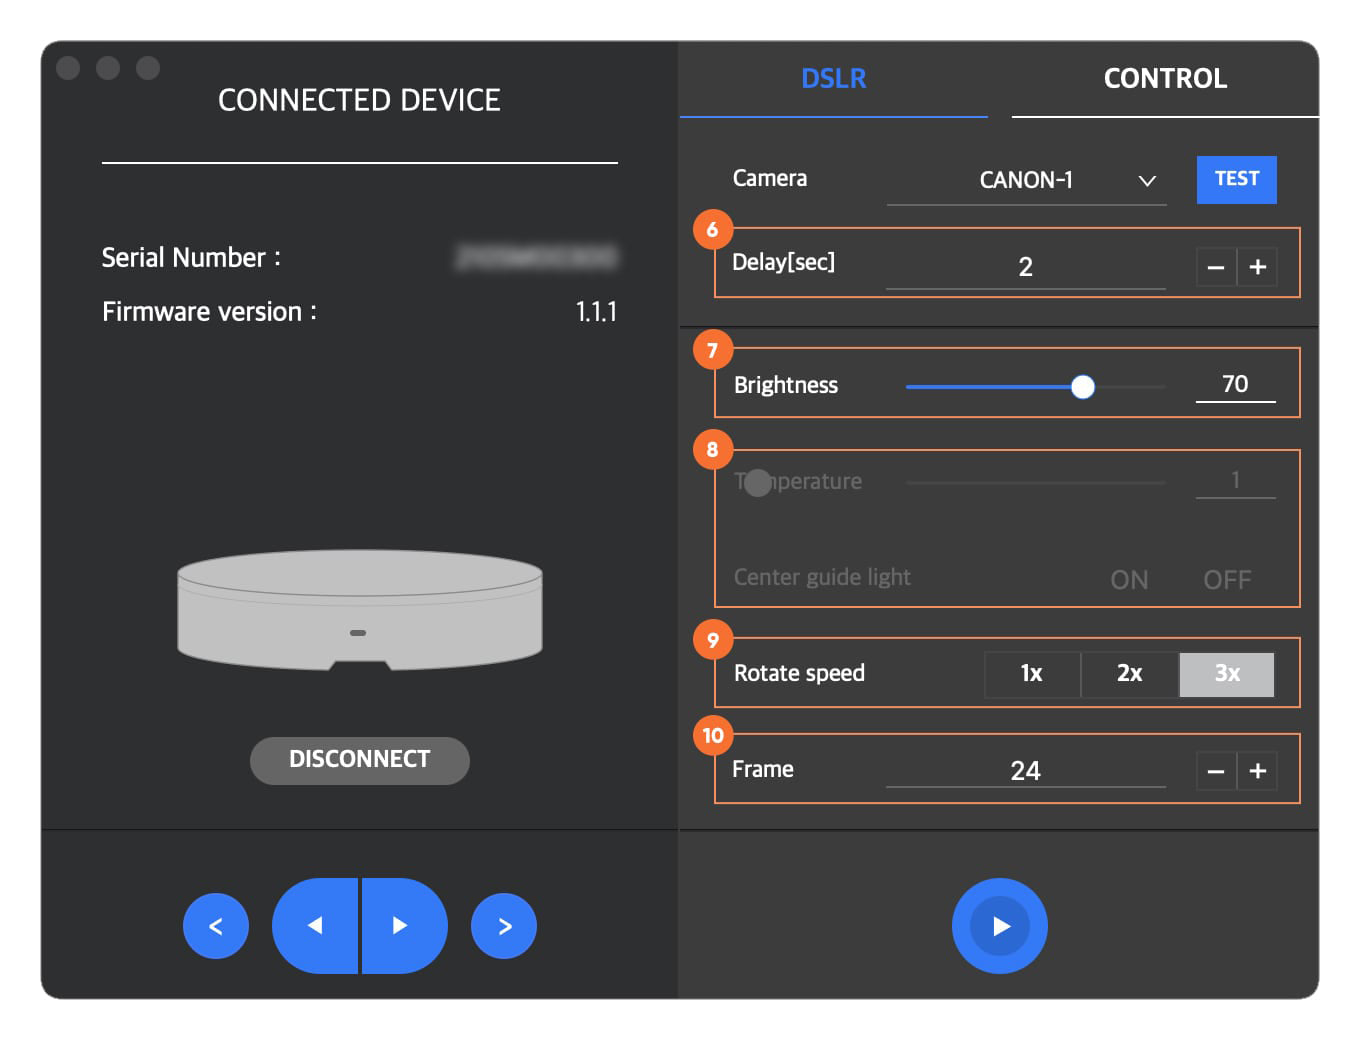
- Choose your desired delay time based on your SD card’s writing speed and image capacity.
- For “Brightness,” adjust the brightness level of the halo edge light on your Foldio360 Smart Turntable to blur the boundary line that may be present between the backdrop and the edge of the turntable. For Foldio360 Smart Dome users, the brightness refers to how bright you want your in-studio LED light to be.
- The next 2 features below, “Temperature” and “Center guide light” are only applicable for Foldio360 Smart Dome users. Since we’re using the Foldio360 Smart Turntable, we will skip these parts.
- Select the speed at which you’d like your turntable to rotate for “Rotate speed.” To have our product rotate as fast as possible, we’re selecting “3x” for the rotate speed.
- For “Frame,” select the number of frames you want to shoot. To keep it minimalistic, we’re selecting “24.”
- Once everything is set in place, you’re ready to start shooting. Click the blue play/pause button right underneath and expect your turntable to rotate and stop automatically while your camera shoots at certain points of the rotation. Do not perform any other action until the turntable has finished rotating 360°.
*Other features are available if you click the ‘CONTROL’ tab on the right hand side of the screen. This is useful for filming videos.
Step 3. Edit 360 images with foldio360 Edit (User Manual)
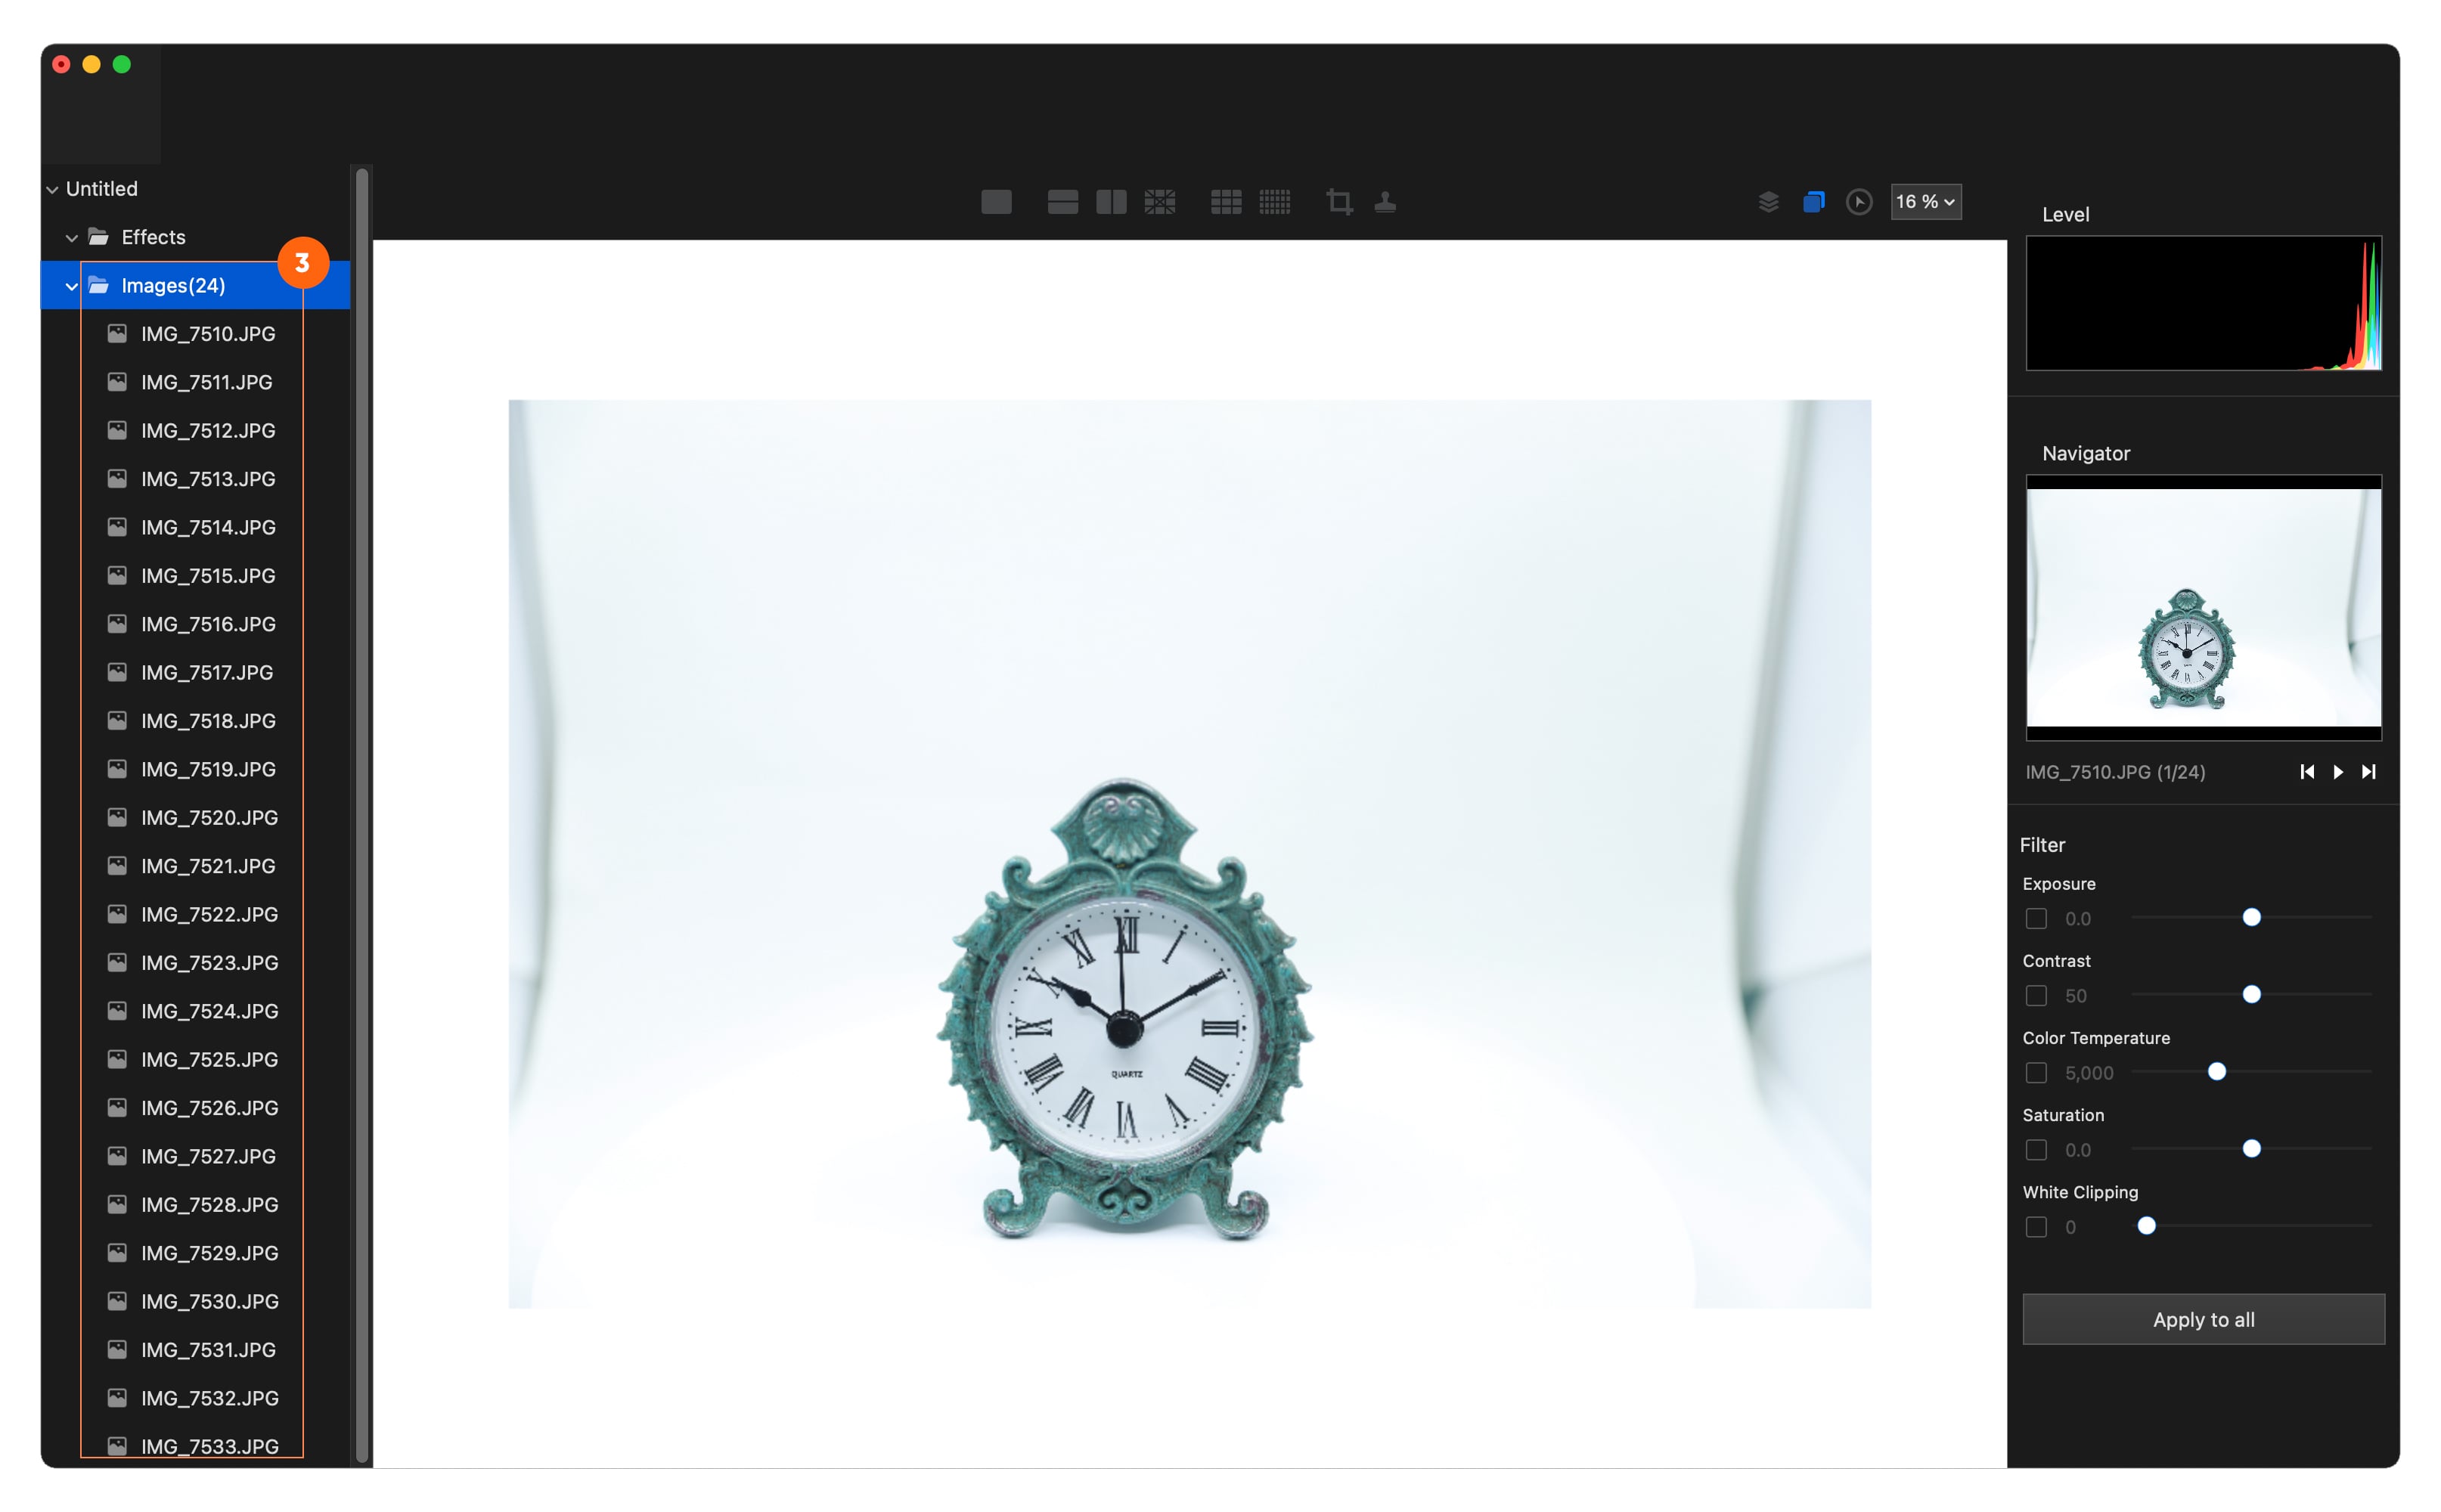
- Import your photos from your camera to your Mac.
- Launch foldio360 Edit on your Mac.
- Import all the 24 images you shot to foldio360 Edit.
- Click the first image file on the left hand side column to start editing.
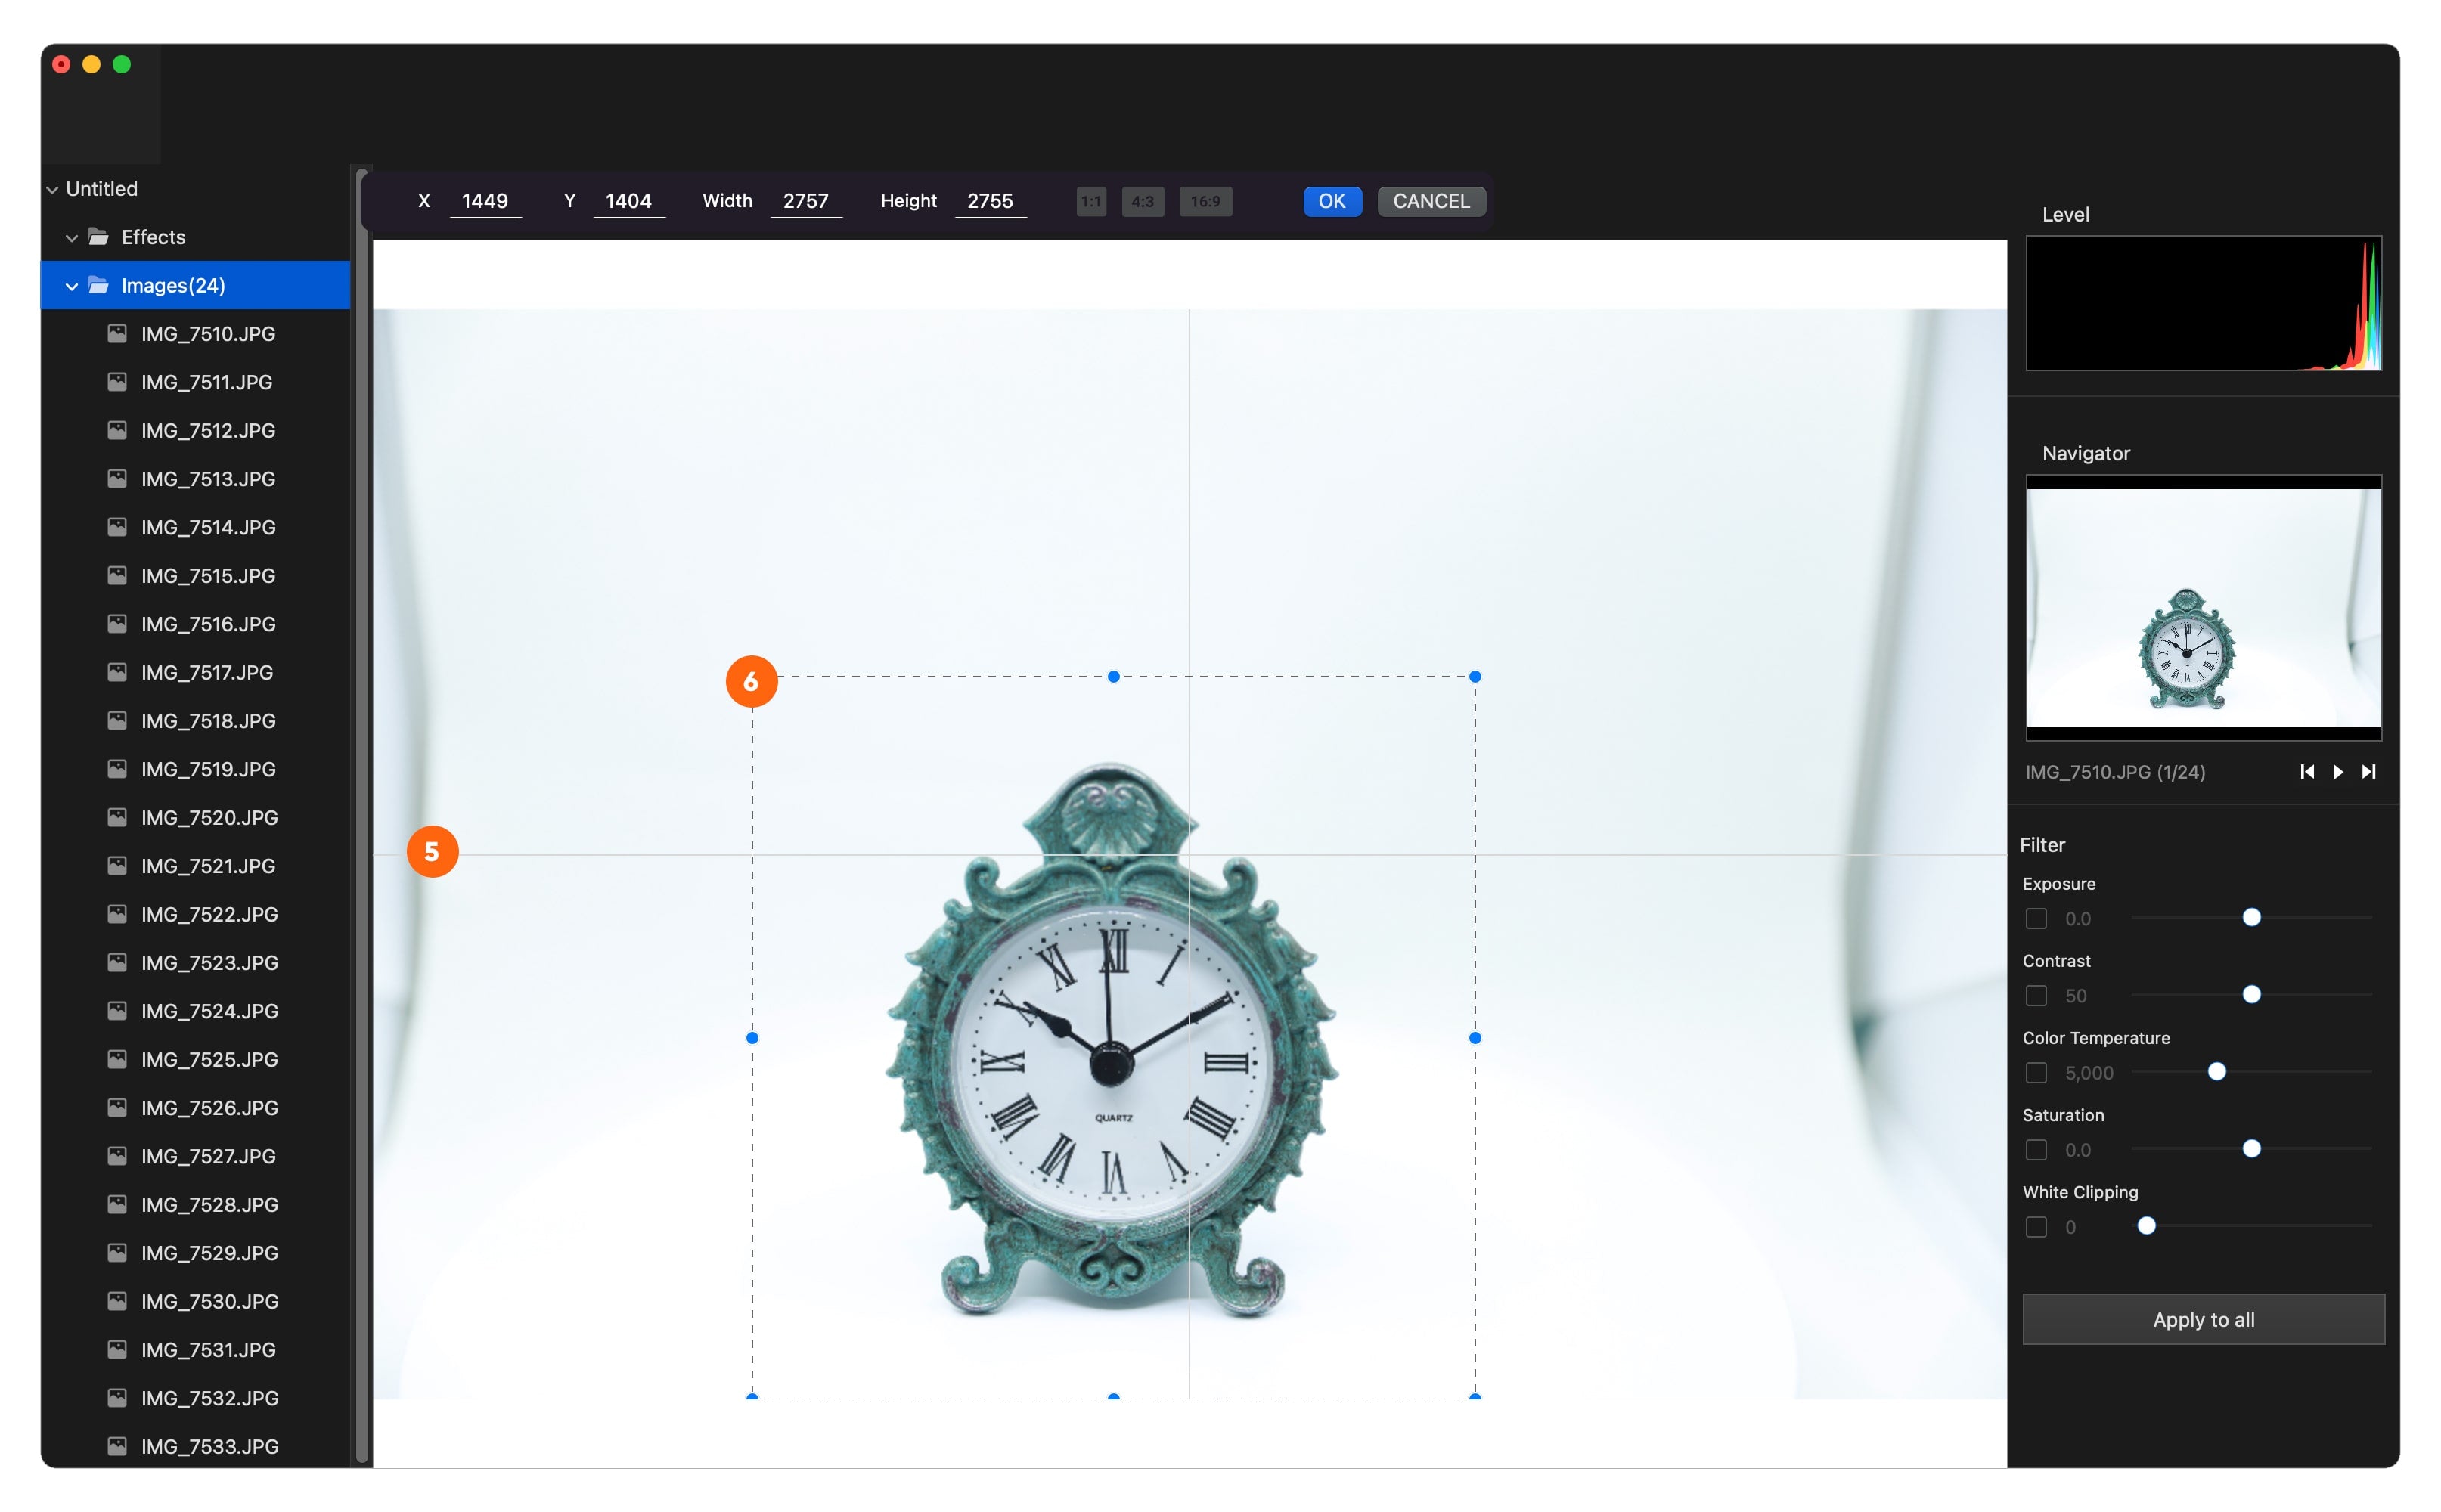
- Check if your image is centered by navigating to the toolbar up top and using the guide tools for frame of reference.
- Click on the ‘crop’ icon in the toolbar to move the crop selection to the center if image is not centered already, and cut unnecessary parts of the image.
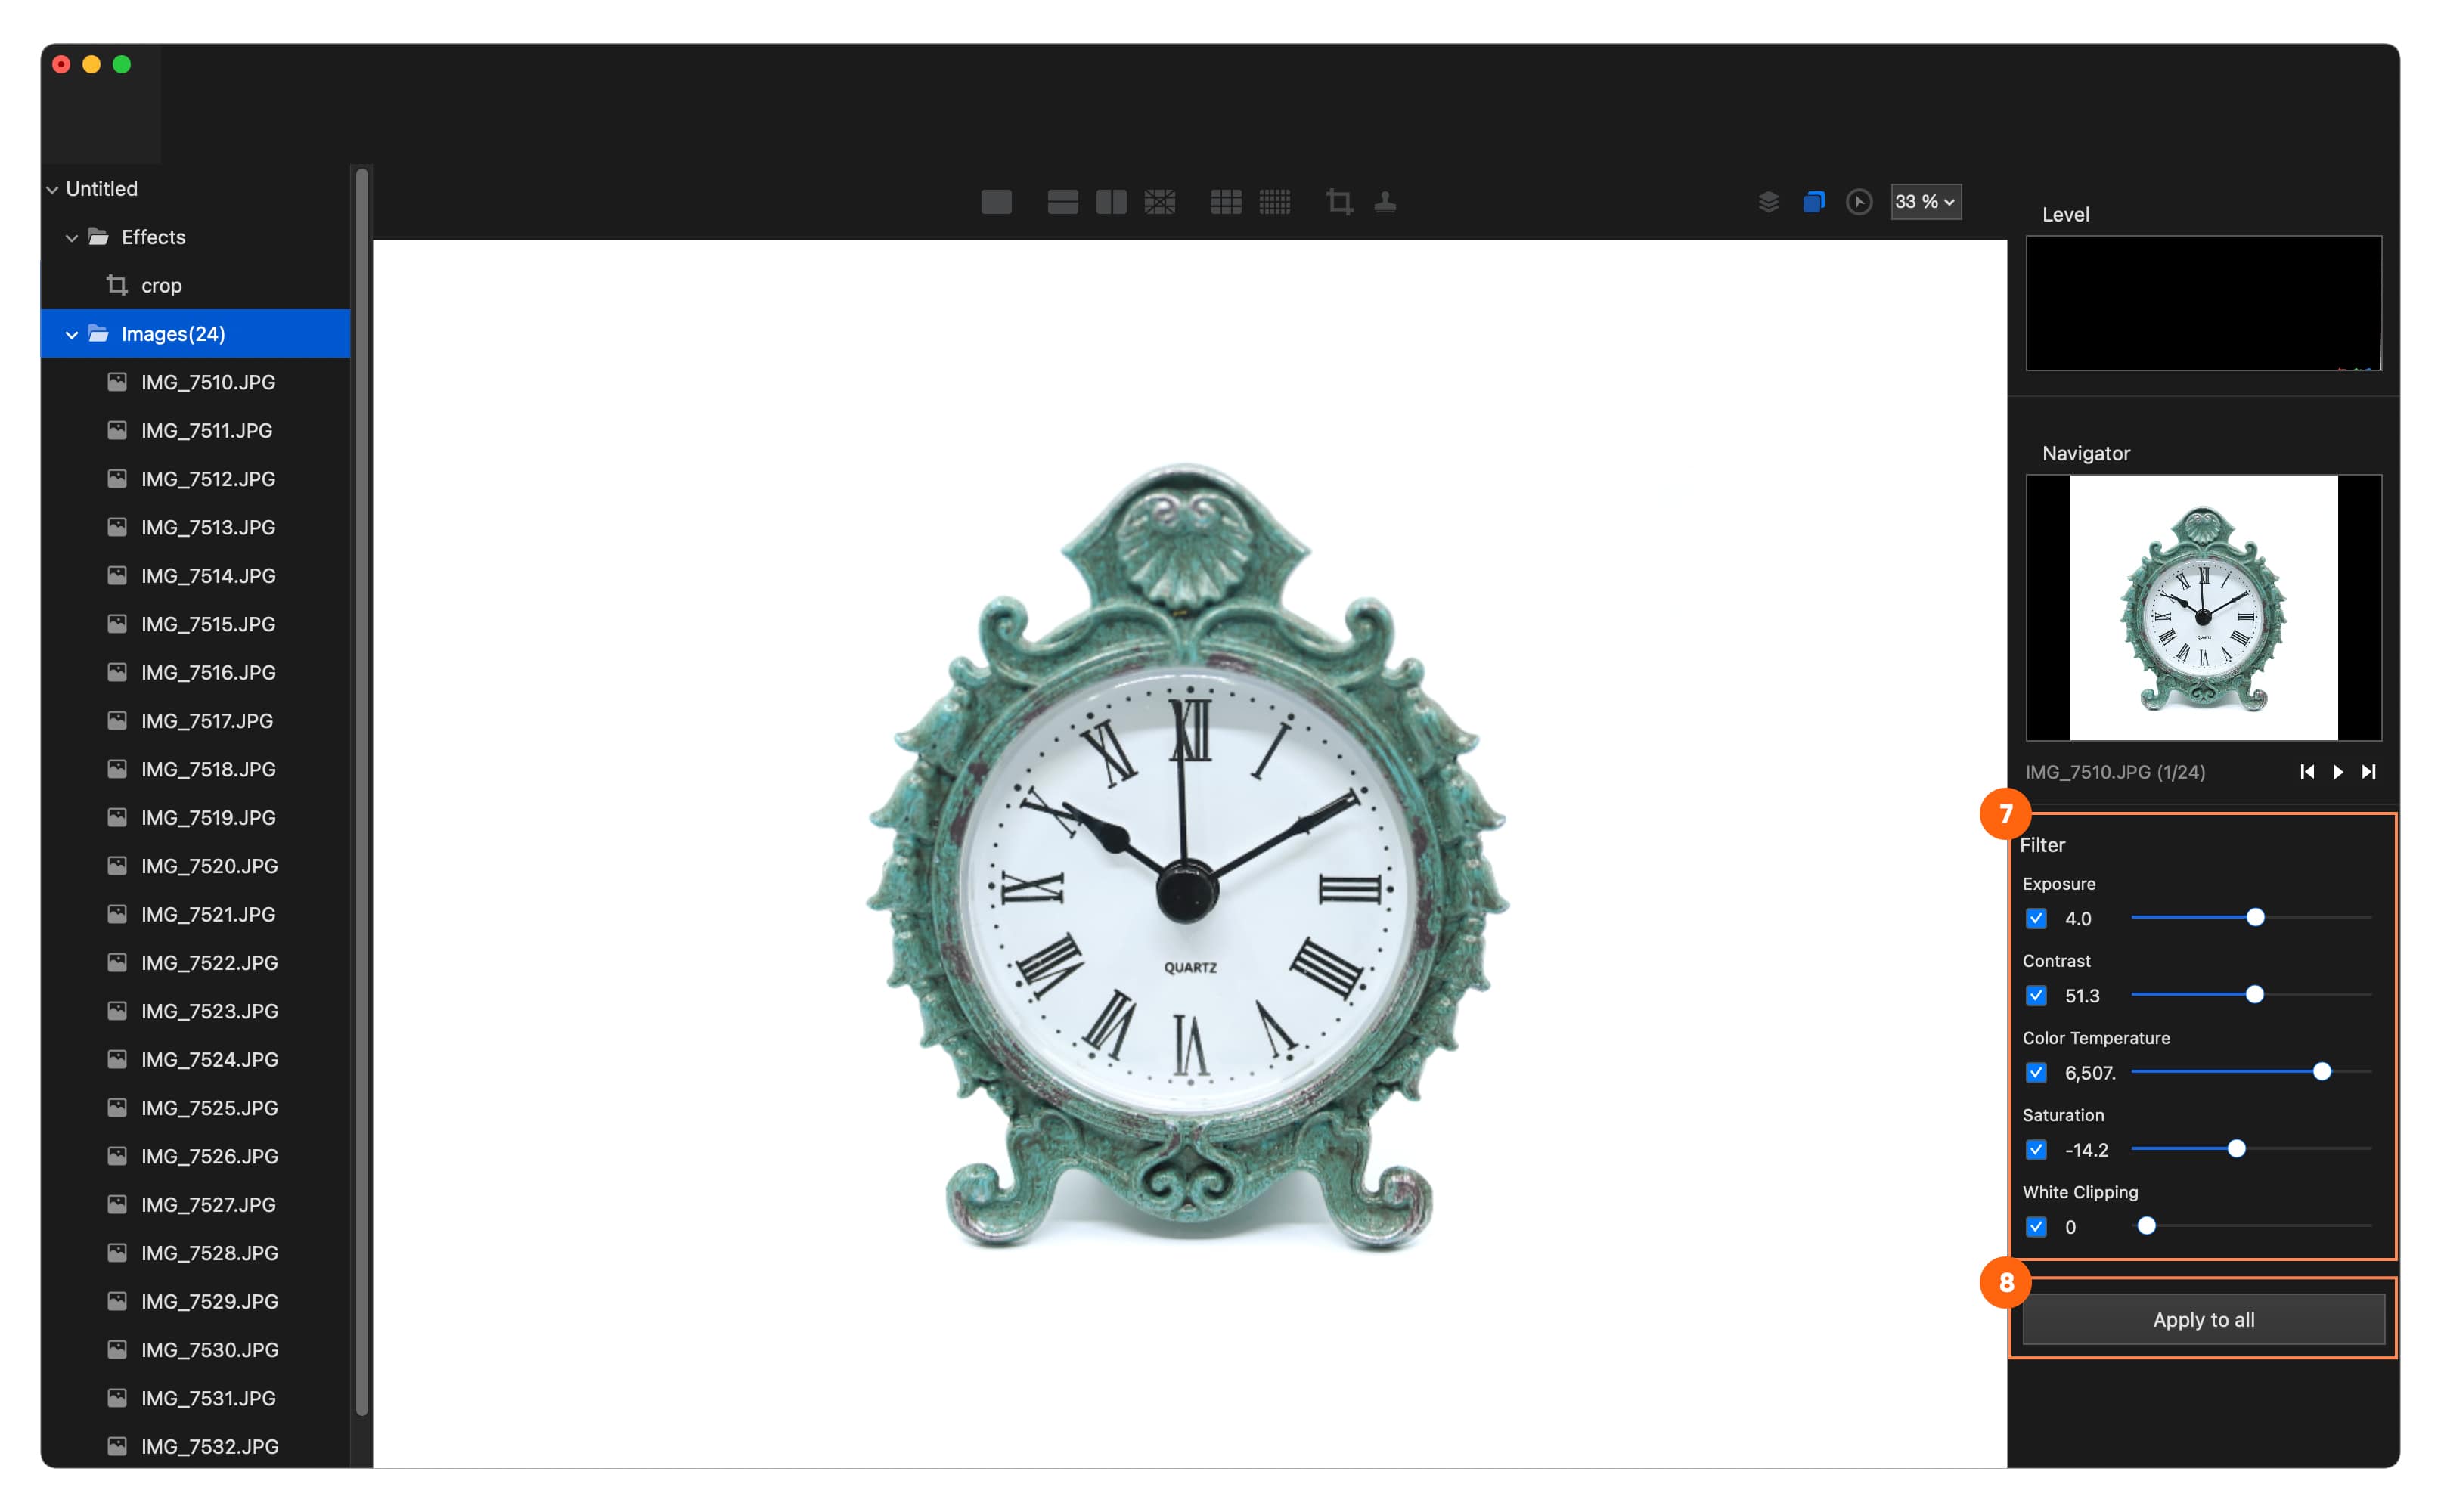
- Navigate to the Parameter Window located at the most right hand column and underneath “Filter,” check off the boxes you wish to activate and start adjusting settings such as exposure, contrast, color temperature, saturation, and white clipping to achieve a clean, seamless look.
- Save time by clicking the “Apply to all” button at the very bottom in order to apply the same edits you just made to the first image file to the rest of the 23 images left. You can utilize this “Apply to all” one-click edit feature for up to 48 images.
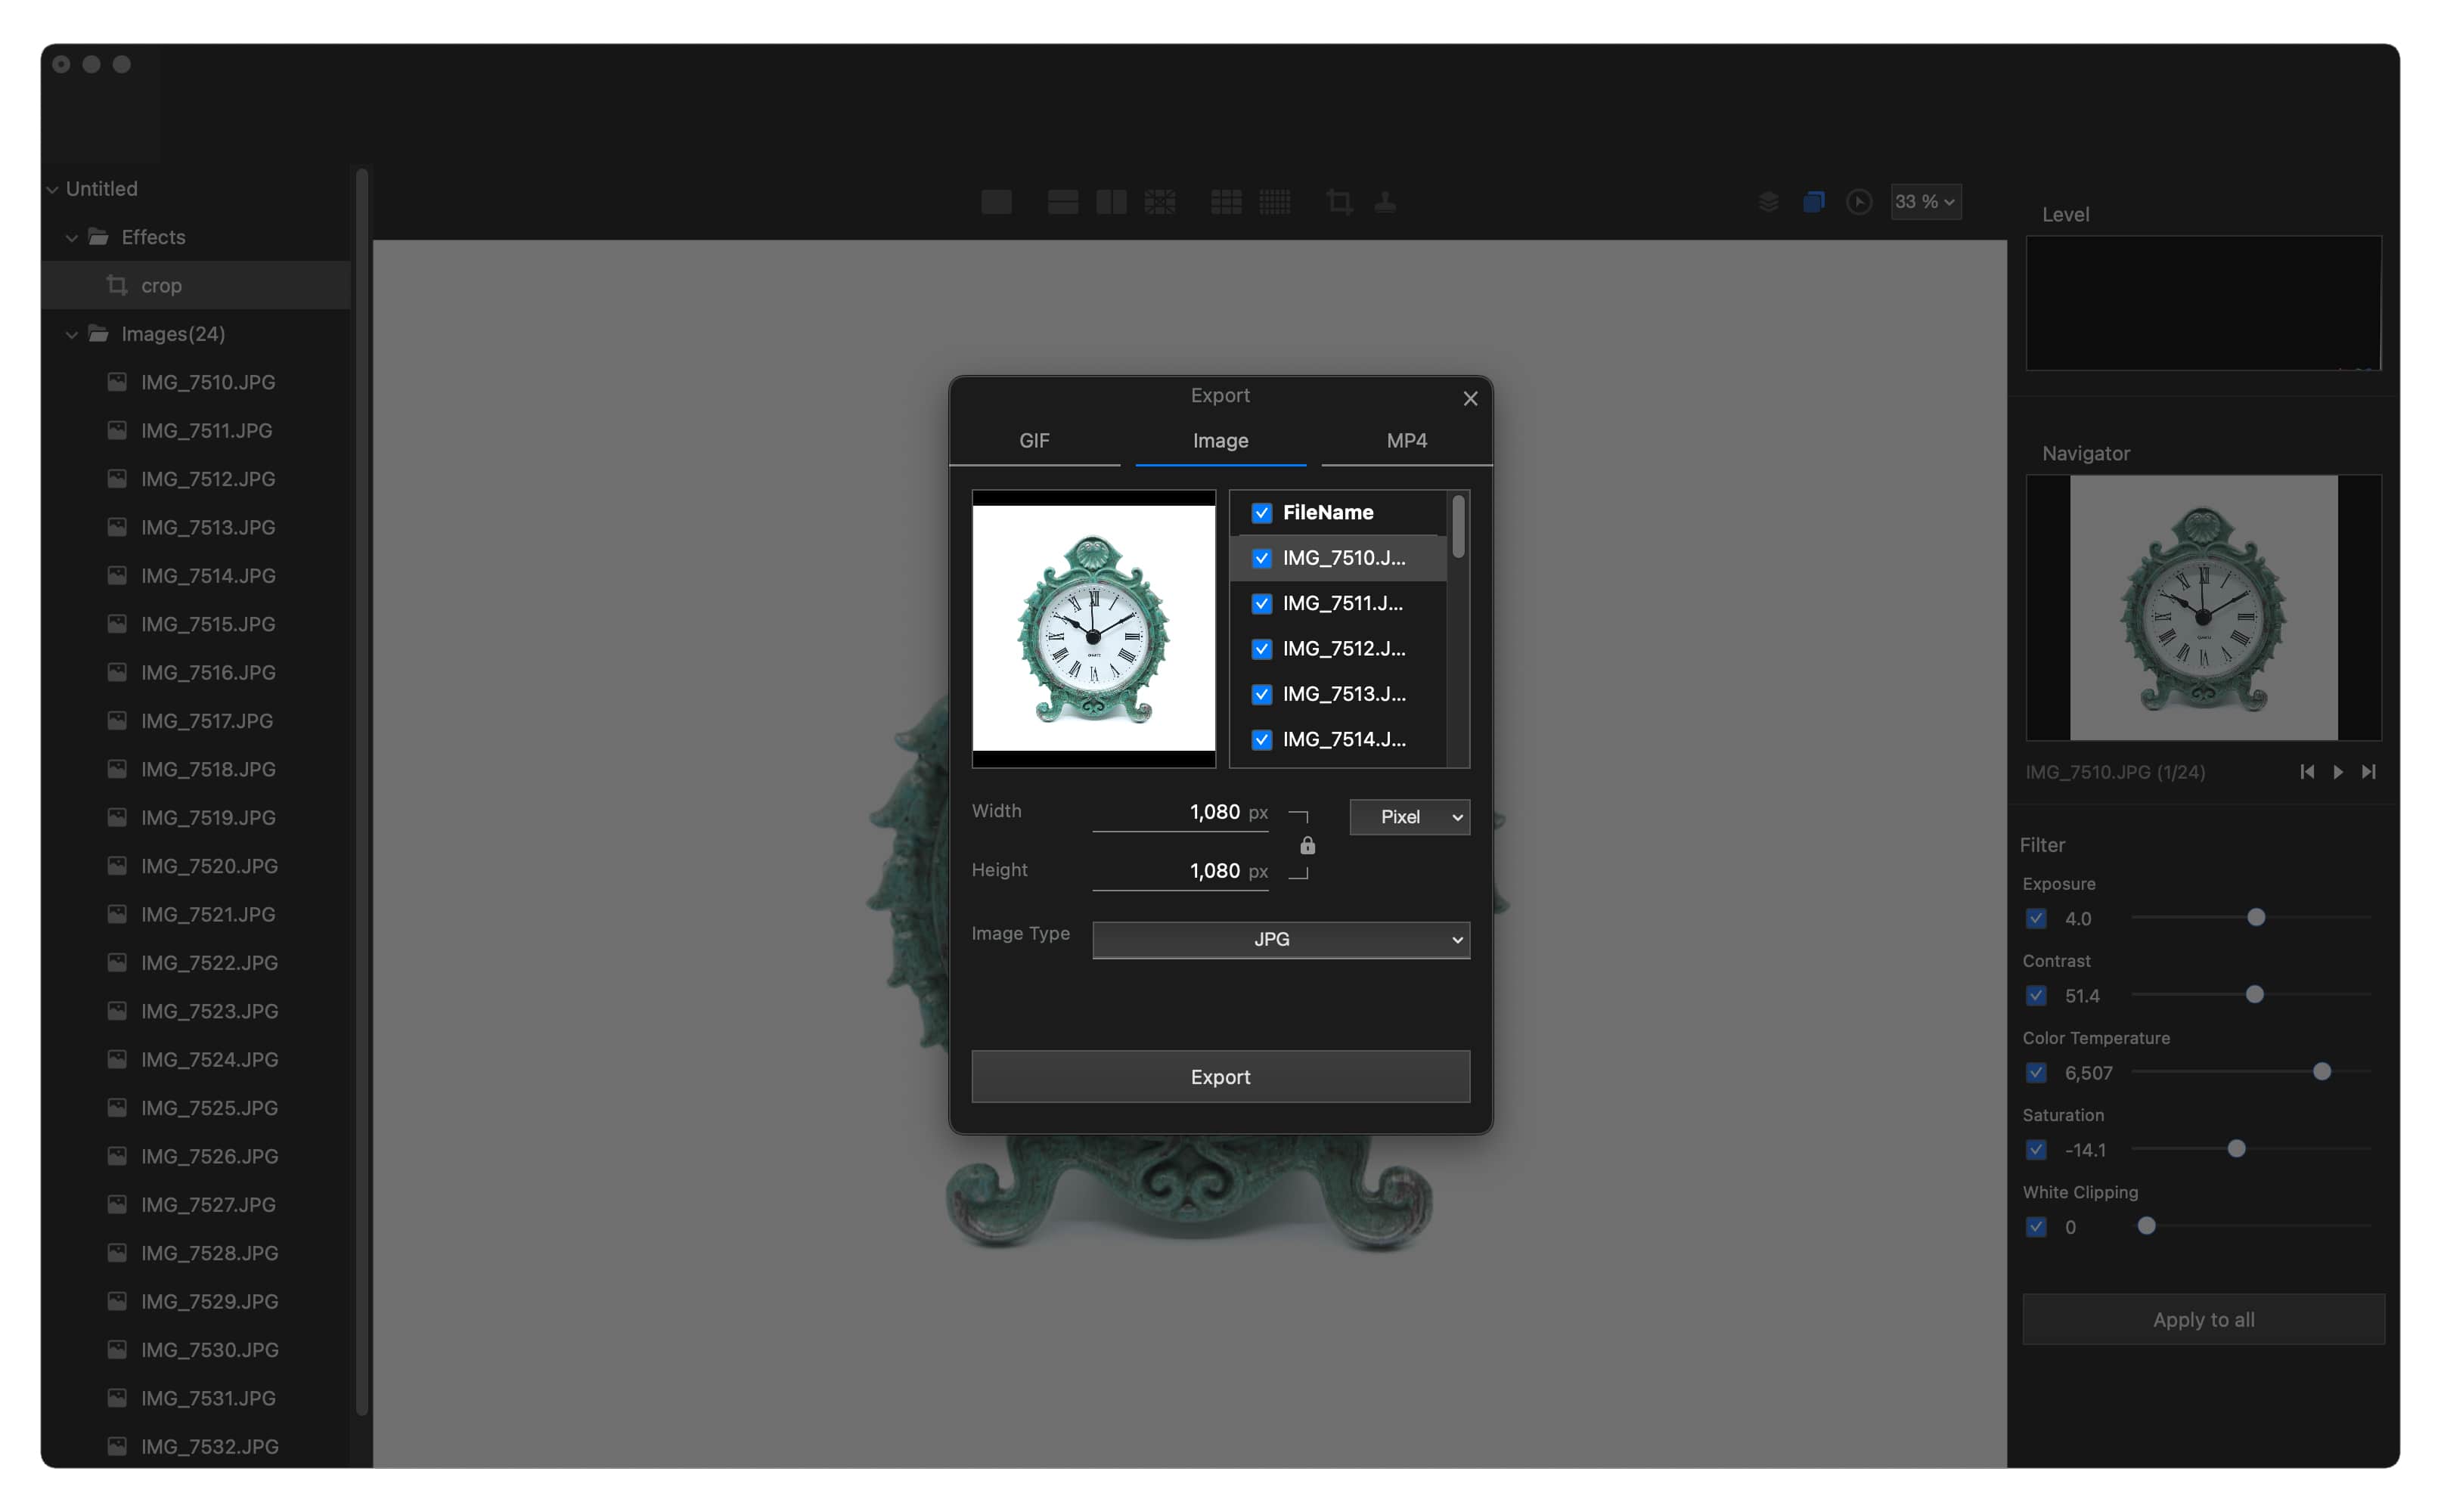
- Click “File” → “Export Images”
- Export to PNG/JPG/GIF/MP4. We will be exporting as JPG.

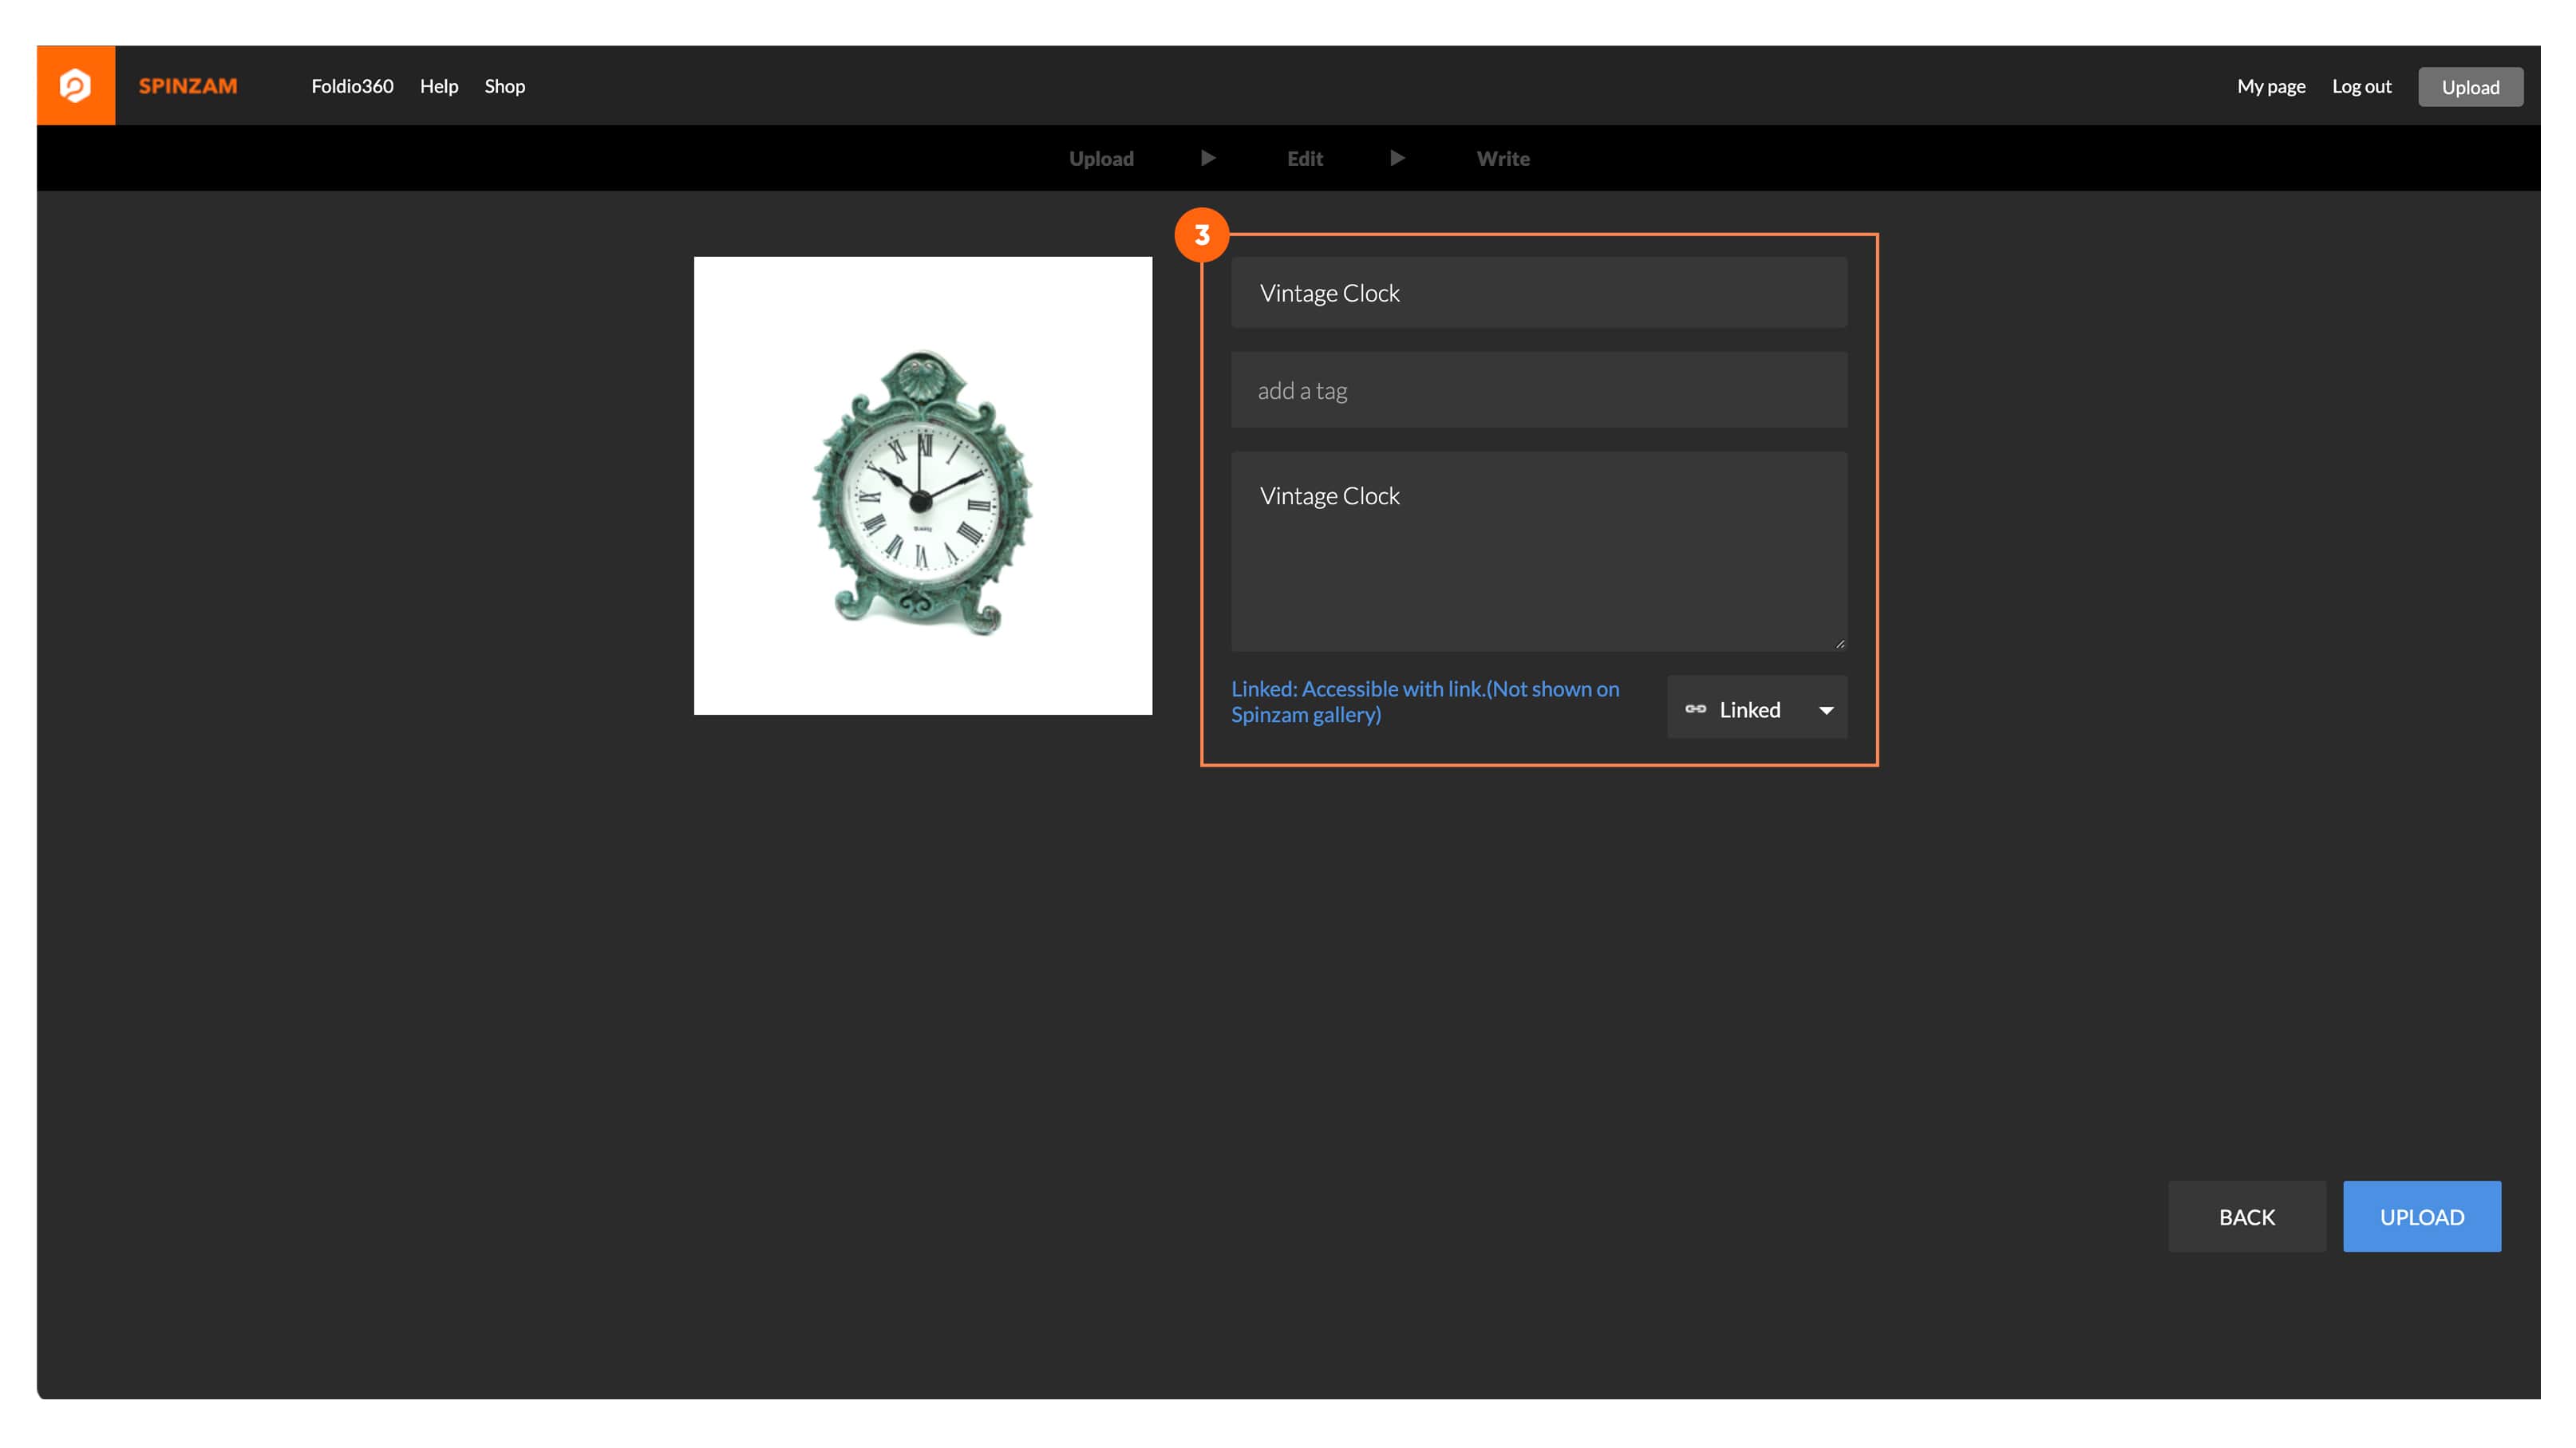
Step 4. Upload on SPINZAM
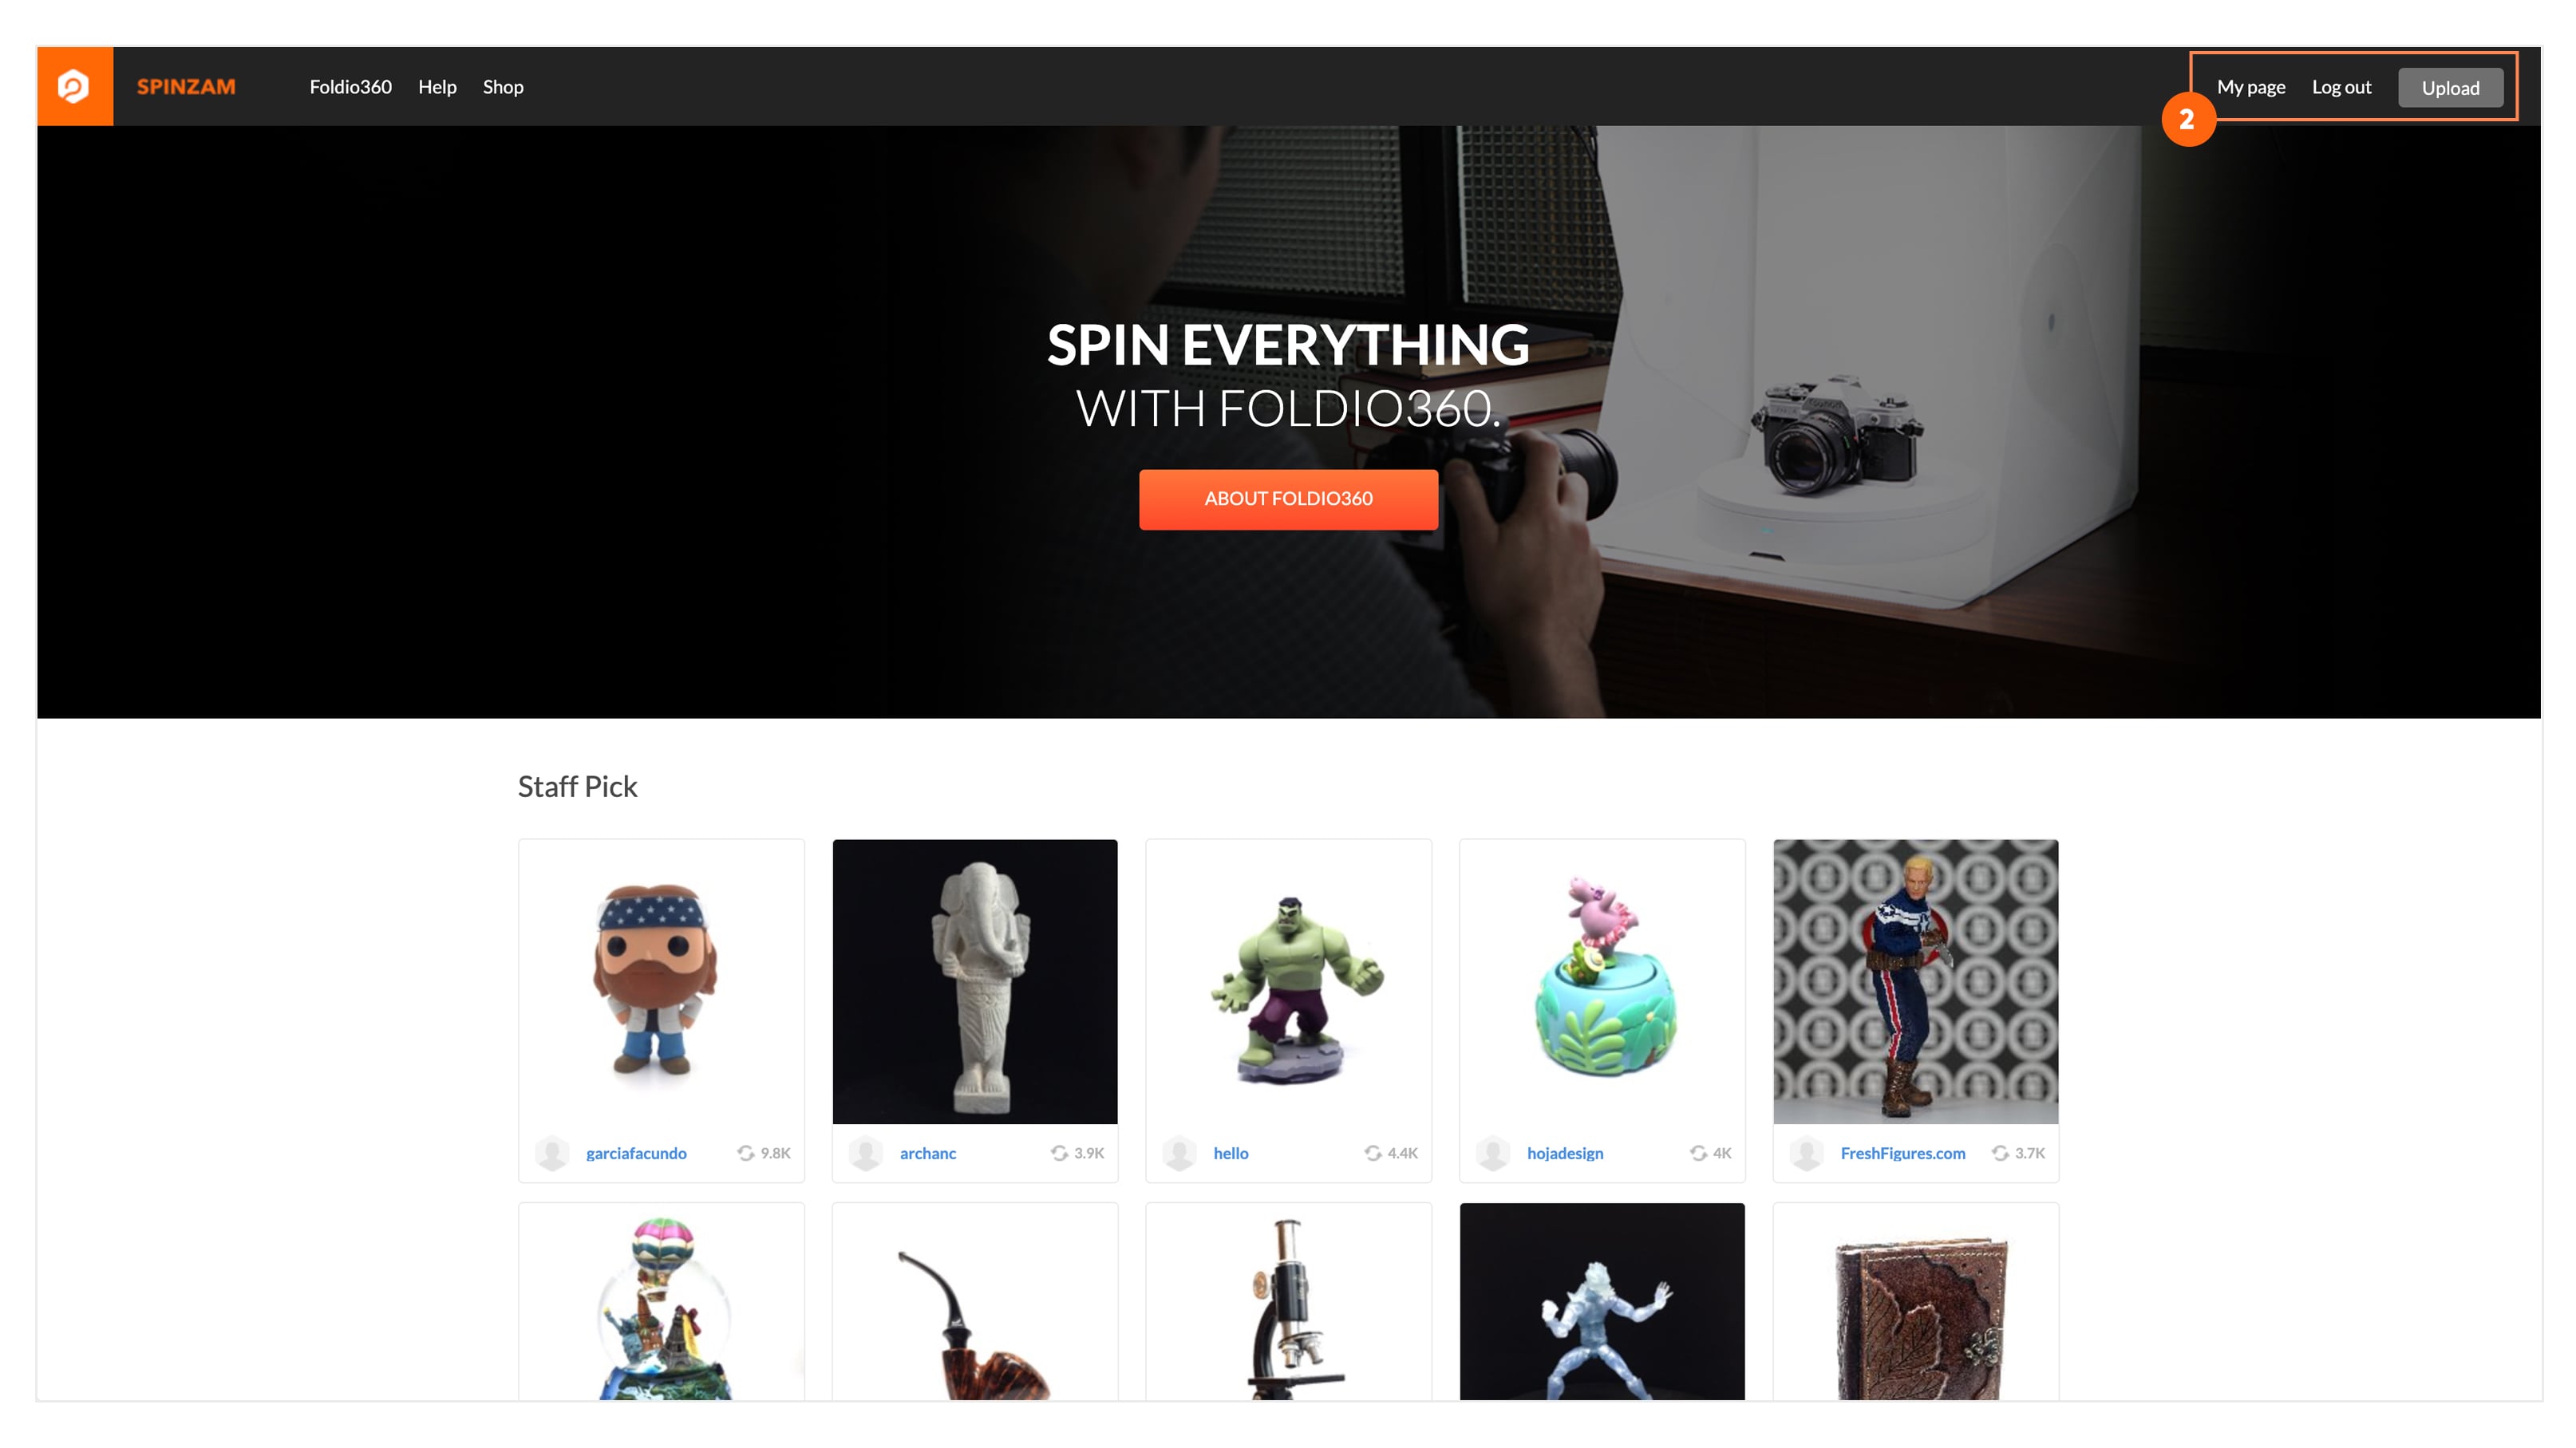
- Now it’s time to make a 360 interactive image. Go to SPINZAM and sign in.
- Located at the upper right hand corner, click “Upload” and insert your new 24 images you just edited.
- Fill in your “Title” and “Description. Then, click the blue “Upload” button at the bottom right hand corner.
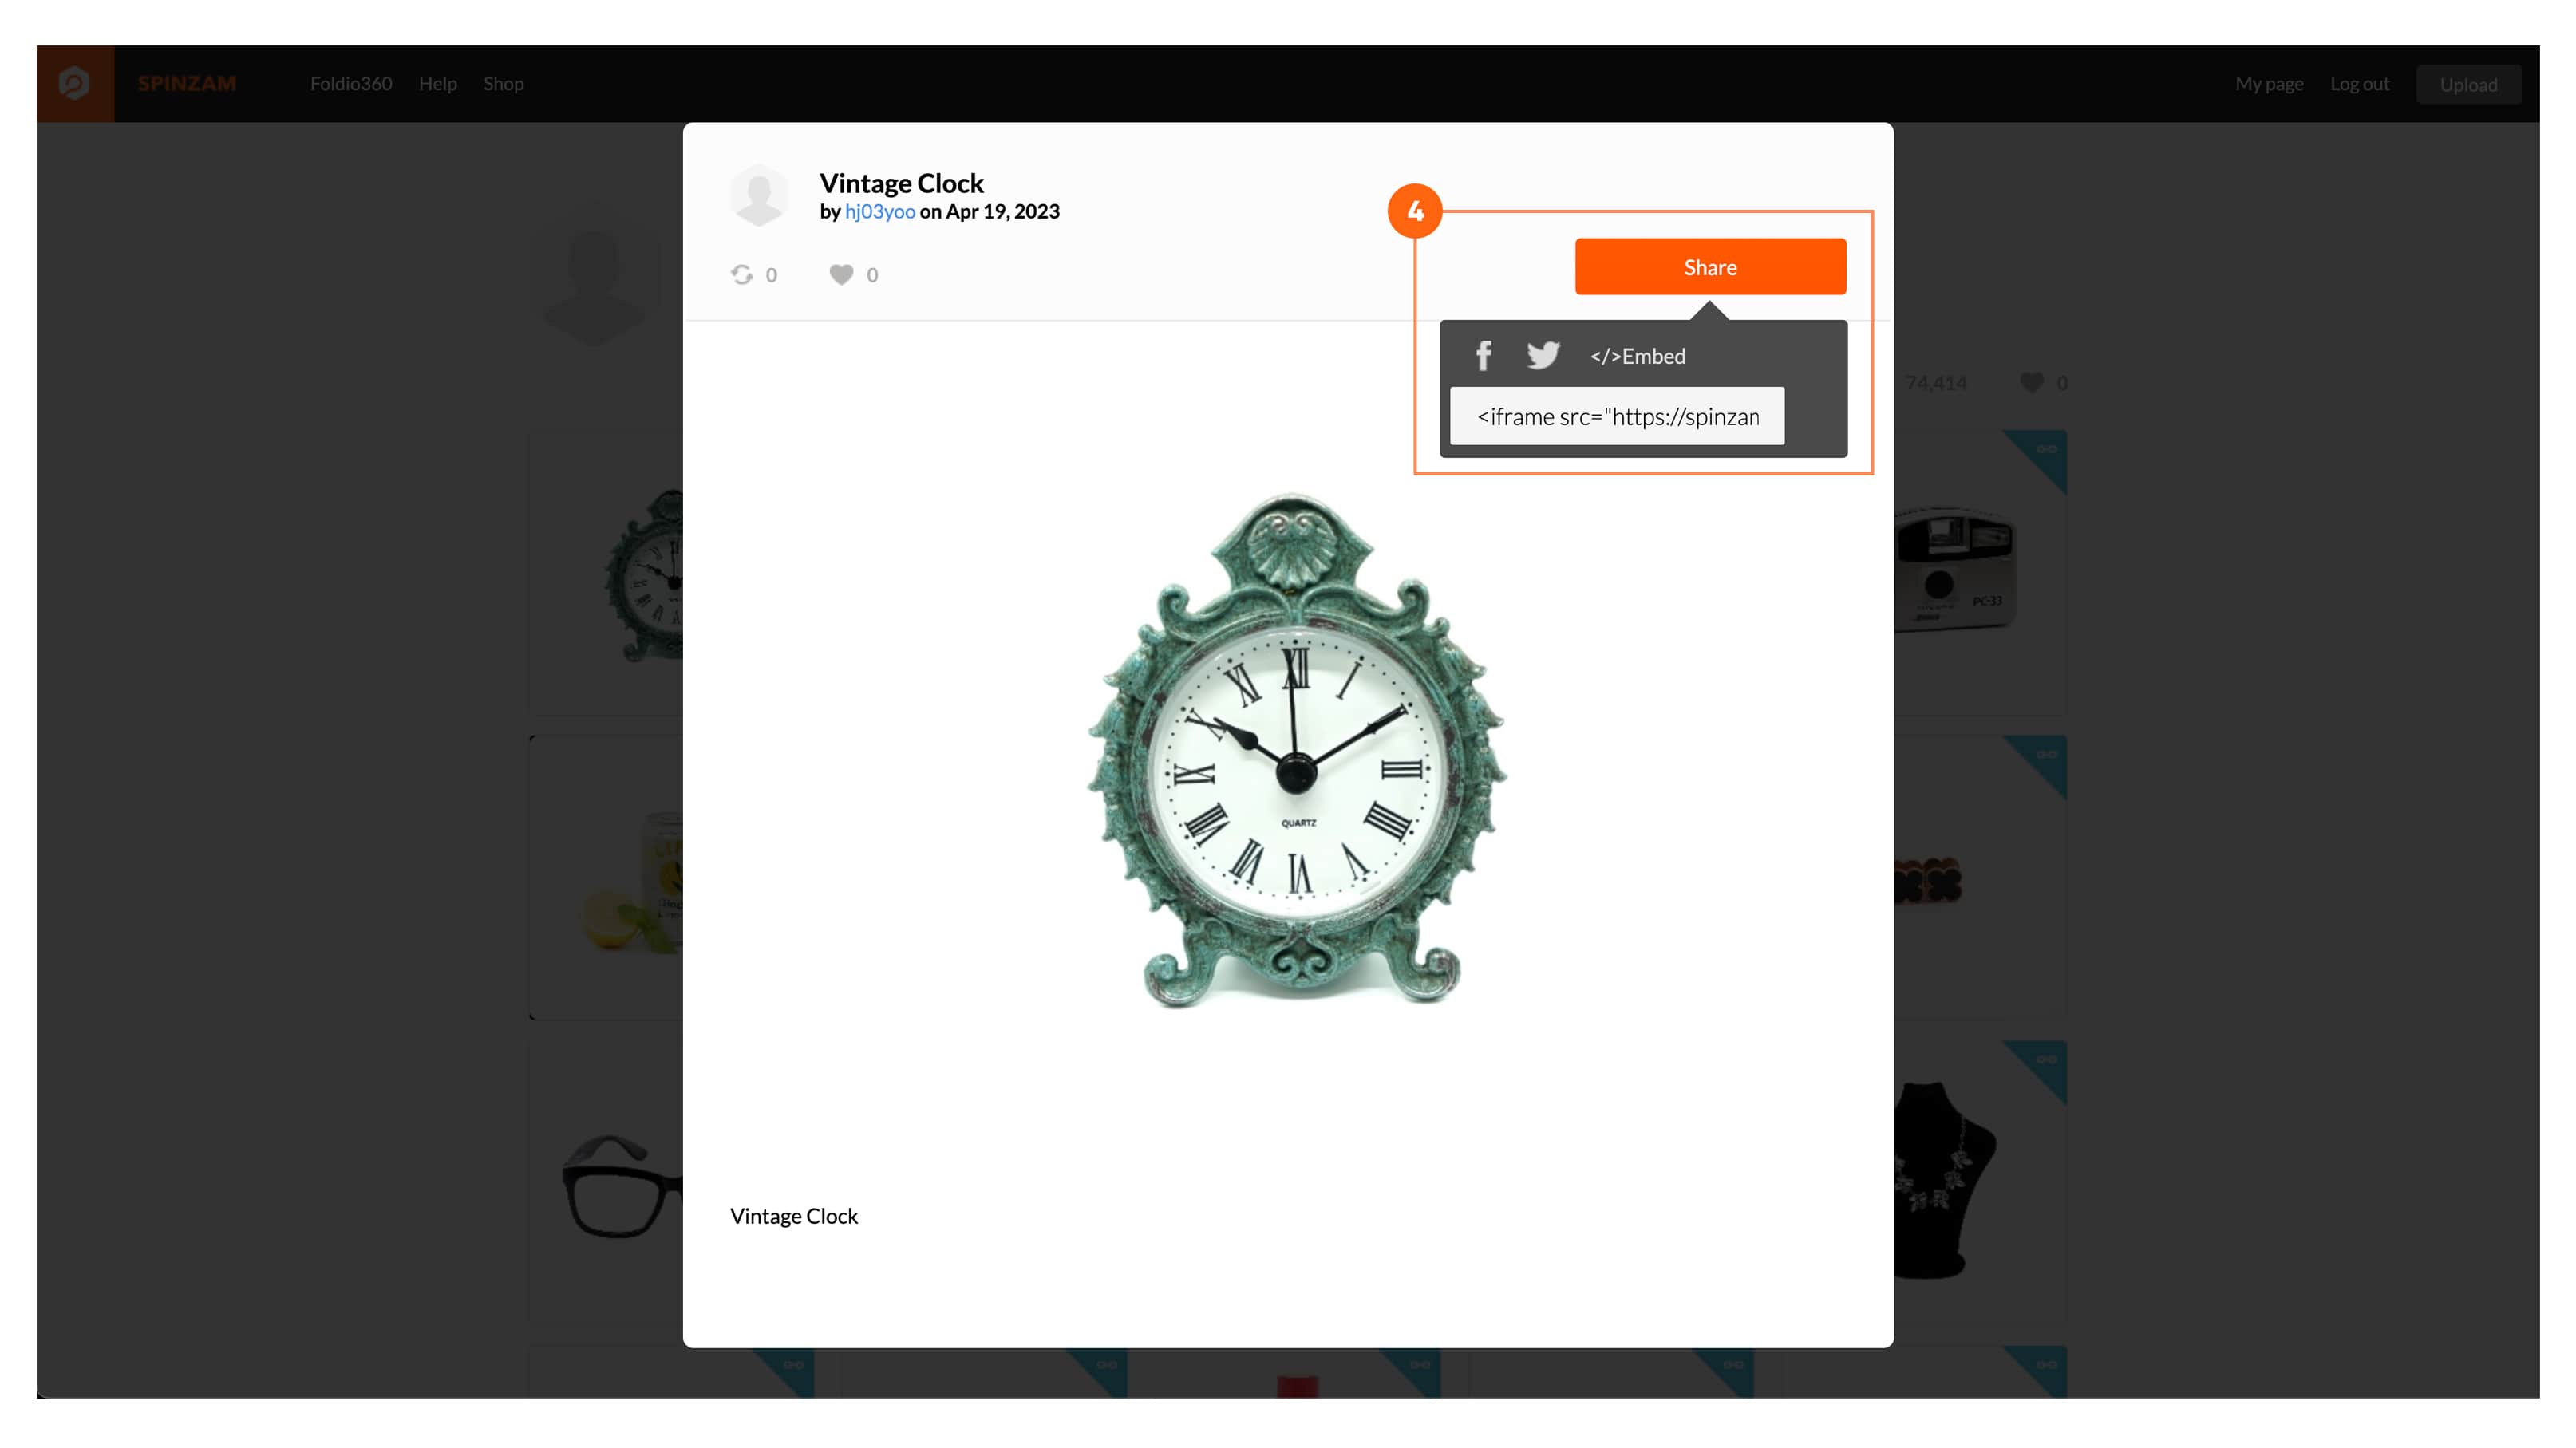
- On your account page, click on the image you just edited and click the “Share” button on the right hand corner of the pop up. Feel free to share on social media or use the iframe code provided to imbed into your website.
- Done!
Please feel free to tag us if you choose to share your 360 image on social media! We’d love to see what you created.


